Homemade Reese’s Cups Dark Chocolate
Uitgelicht onder: Creatieve bakideeën
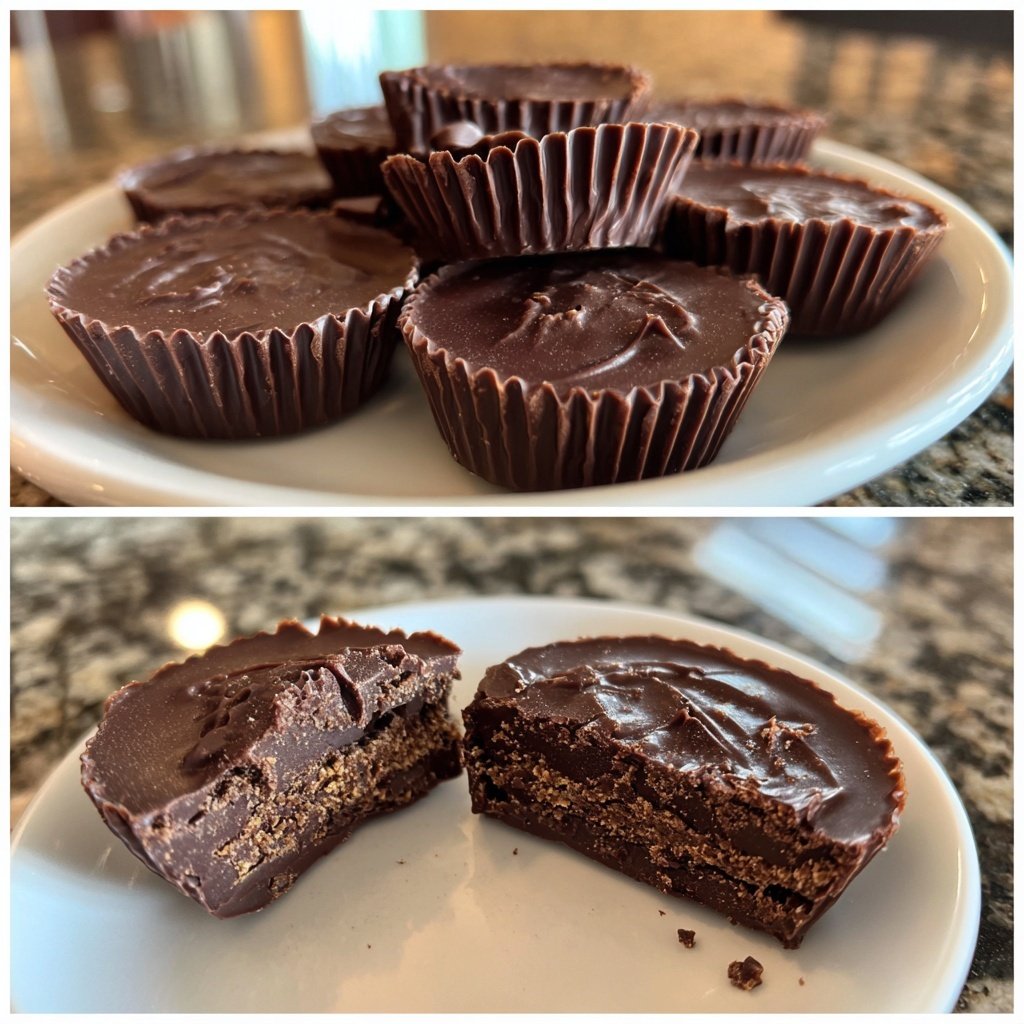
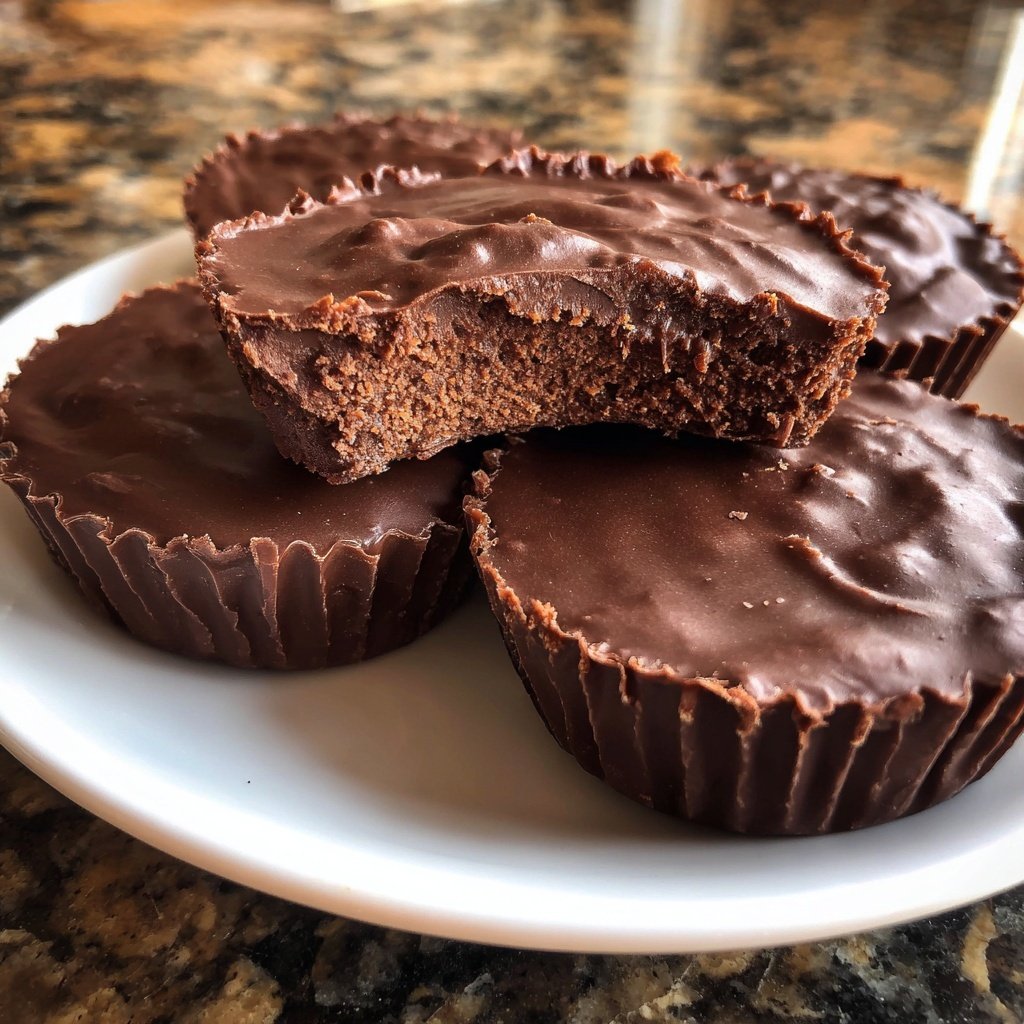
I absolutely adore making my own version of Reese’s Cups at home! The combination of creamy peanut butter and rich dark chocolate creates a delightful treat that is simply irresistible. It's a fun and rewarding process to create these indulgent cups, and they make for a perfect gift or a special snack. Plus, knowing exactly what goes into them makes each bite even more satisfying. Let me share the joy of crafting these homemade delights with you!
Making my own Reese’s Cups has become one of my favorite kitchen adventures. I love experimenting with dark chocolate, which provides a deliciously deep flavor that pairs perfectly with the sweet and salty peanut butter filling. One thing I’ve learned is to temper the chocolate for a glossy finish and satisfying snap!
This method not only ensures a professional touch but also helps avoid that unpleasant waxy texture often found in store-bought versions. Each bite is a heavenly experience, and once you try them, store-bought will never compare!
Reasons You'll Love This Recipe
- Rich chocolate flavor paired with creamy peanut butter
- Perfectly balanced sweetness and saltiness
- Easy to customize with different types of chocolate
Mastering the Chocolate Layer
Melting chocolate properly is crucial for achieving that smooth, glossy finish that makes these cups so appealing. When using dark chocolate chips, opt for a high-quality brand for the best flavor and texture. The addition of coconut oil helps to prevent the chocolate from seizing; it also aids in keeping the chocolate from becoming too rigid once chilled. If you'd like to adjust the sweetness, you can even use chocolate with a higher cocoa content, but be mindful that it will have a more intense flavor.
When melting the chocolate, take care not to overheat it, as this can cause it to become grainy and unworkable. A microwave works well for this purpose, but if you prefer a stovetop method, use a double boiler and keep the water at a gentle simmer. Stir the chocolate consistently as it melts until it turns glossy and fully combines with the coconut oil. If you notice any lumps, remove it from heat immediately and continue stirring until smooth.
Perfecting the Peanut Butter Filling
The peanut butter filling is the heart of these homemade treats, and the right texture is essential. Using creamy peanut butter ensures that the filling remains smooth and spreads easily within each cup. To achieve the perfect balance of sweetness and a touch of saltiness, be sure to measure the powdered sugar and salt accurately. If you prefer a more natural alternative, consider using maple syrup instead of powdered sugar, but be aware this could change the filling's consistency slightly.
For an extra kick of flavor, feel free to add a pinch of vanilla extract or a sprinkle of cinnamon to the peanut butter mixture. This can elevate the overall taste and complement the chocolate beautifully. If you need a nut-free option, try substituting the peanut butter with tahini or sunflower seed butter; these alternatives will provide a similar texture and keep the recipe inclusive for those with nut allergies.
Storing and Serving Your Cups
Once your homemade Reese's cups have set, storing them correctly will ensure they maintain their delicious flavor and texture. Keep them in an airtight container in the refrigerator, where they will stay fresh for up to two weeks. If you have a larger batch and need to store them long-term, consider freezing them. Place the cups in a single layer on a baking sheet until solid, then transfer them to a freezer-safe container. They can last for up to three months in the freezer and can be enjoyed straight from the freezer or allowed to soften for a few minutes at room temperature.
To serve, these delightful cups can be enjoyed plain, or you can elevate your presentation. Consider drizzling a little additional melted chocolate on top or sprinkling with sea salt for a gourmet touch. They make an excellent homemade gift, especially when packaged nicely in a decorative box or tin. If you wish to experiment, try incorporating either a caramel layer or chopped nuts into the filling for variations on the classic flavor.
Ingrediënten
Gather these ingredients for a delightful treat!
For the Chocolate Cups
- 1 cup dark chocolate chips
- 1 tablespoon coconut oil
For the Peanut Butter Filling
- 1/2 cup creamy peanut butter
- 1/4 cup powdered sugar
- 1/4 teaspoon salt
Now that we have everything ready, let's get started!
Bereidingswijze
Follow these simple steps to create your homemade Reese’s Cups.
Melt the Chocolate
In a microwave-safe bowl, combine the dark chocolate chips and coconut oil. Heat in 30-second intervals, stirring in between, until smooth and completely melted.
Prepare the Muffin Tin
Line a muffin tin with cupcake liners. Pour a small amount of melted chocolate into each liner, just enough to cover the bottom.
Make the Peanut Butter Filling
In a mixing bowl, combine the peanut butter, powdered sugar, and salt until smooth and well-combined.
Assemble the Cups
Spoon the peanut butter mixture over the chocolate layer in each liner. Then, pour additional melted chocolate on top to completely cover the filling.
Chill and Set
Place the muffin tin in the refrigerator for about 15 minutes, or until the chocolate has hardened completely.
Once set, enjoy your delicious homemade Reese’s Cups!
Professionele Tips
- For added flair, try sprinkling sea salt on top before chilling for an explosion of flavor.
Troubleshooting Tips
If you find that your chocolate layer has seized or become grainy, try adding a small amount of coconut oil or vegetable shortening while gently reheating it. This can help rescue the consistency and restore its smooth texture. Make sure to keep the heat low—high temperatures are usually the culprit for chocolate mishaps.
In case your peanut butter filling is too runny or too thick, you can adjust the texture by adding more powdered sugar to thicken it or a touch of milk to loosen it. Stir gradually and recheck the consistency to ensure it's just right before filling your chocolate cups.
Variations to Consider
For chocolate lovers, why not try using a combination of dark and milk chocolate for the cups? This dual-layer approach offers a unique flavor profile and visual effect that makes each bite exciting. If you're feeling adventurous, experiment with flavored chocolate, such as mint or espresso, to provide a twist on the classic taste.
Additionally, consider adding fillings beyond the traditional peanut butter. Nutella offers a deliciously rich alternative, while almond butter or cashew butter can cater to different tastes and preferences. Coconut flakes or crushed pretzels can add a delightful crunch and enhance the overall texture of the treats.
Vragen Over Recepten
→ Can I use milk chocolate instead of dark chocolate?
Yes, milk chocolate can be used, but it will yield a sweeter flavor.
→ How long can I store these cups?
Store them in an airtight container in the fridge for up to two weeks.
→ Can I use almond or cashew butter?
Absolutely! These alternatives will provide a different flavor profile that's equally delicious.
→ Are these gluten-free?
Yes, as long as your ingredients are gluten-free, these treats can be enjoyed by everyone!
Homemade Reese’s Cups Dark Chocolate
Gemaakt door: Allegra Stone
Recepttype: Creatieve bakideeën
Vaardigheidsniveau: Easy
Eindportie: 12 cups
Wat je Nodig Hebt
For the Chocolate Cups
- 1 cup dark chocolate chips
- 1 tablespoon coconut oil
For the Peanut Butter Filling
- 1/2 cup creamy peanut butter
- 1/4 cup powdered sugar
- 1/4 teaspoon salt
Stappen
In a microwave-safe bowl, combine the dark chocolate chips and coconut oil. Heat in 30-second intervals, stirring in between, until smooth and completely melted.
Line a muffin tin with cupcake liners. Pour a small amount of melted chocolate into each liner, just enough to cover the bottom.
In a mixing bowl, combine the peanut butter, powdered sugar, and salt until smooth and well-combined.
Spoon the peanut butter mixture over the chocolate layer in each liner. Then, pour additional melted chocolate on top to completely cover the filling.
Place the muffin tin in the refrigerator for about 15 minutes, or until the chocolate has hardened completely.
Extra Tips
- For added flair, try sprinkling sea salt on top before chilling for an explosion of flavor.
Voedingswaarde (Per Portie)
- Calories: 150 kcal
- Total Fat: 10g
- Saturated Fat: 3g
- Cholesterol: 0mg
- Sodium: 50mg
- Total Carbohydrates: 14g
- Dietary Fiber: 1g
- Sugars: 7g
- Protein: 3g